There are a number of reasons for cracking and breakage in metal cutting bimetal bandsaw blades, so in this article we’ll detail the main ones we come across. Briefly summarised, they are:
- Weld failure
- Poorly adjusted guides
- Worn guides
- Poor guide design
- Wear & tear
- Material size vs. machine capacity
- Blade tooth type
- Bandsaw wheel alignment & camber angle
- Band composition & quality
Weld Failure
Even though weld failure is not the most common cause of bandsaw blade breakage, there is an important point we want to mention which must be remembered when reading the rest of this article. Unlike most other welding, a bandsaw weld is almost always the weakest part of the blade, even when welded by trained operators on the latest CNC welding equipment. So, if any other factor is negatively affecting the blade, there is a high chance the weld will be the first place to crack.
In this situation there will usually be tell-tale signs of other stress around the blade – blunt or stripped teeth, further stress cracking, bent blades, or wear marks from the guides. Where any of these signs are present, probably you either have a worn-out blade or another one of the issues detailed below.
If none of those signs are present, chances are it is a genuine weld failure, and you will be best to return the blade for professional inspection & repair/replacement.
Poorly Adjusted Guides
By our estimate, issues with blade guides account for approx. 80% of the breakages we see. There are numerous things which can go wrong;
Most bandsaw models have a combination of bearings and carbide guide pads to straighten the blade as it comes off the wheels and into the cutting zone. It is critical these are set correctly. Generally, the bearings will be on a cam system which allows you to adjust them in and out on the side of the blade. The golden rule is that the bearings should be doing the bulk of the blade straightening work, NOT the carbide pads. Where the carbide pads are rubbing the side of the blade, especially if they are pressing unevenly, you have a perfect blade cracking recipe.
To achieve correct guide adjustment, remove the blade, back off the bearing guides, tighten a short, straight piece of blade between the carbide pads, adjust the bearings in again until they rub on the piece of blade, and fasten them there. Then we back the carbide pads off ever so slightly – say 0.05mm away from the blade.
Some machines have a bearing or carbide pad for the back edge of the blade. This needs to be set at a height which means it isn’t putting pressure on the back edge of the blade when the blade is running, but not cutting.
A final note on guide setting; set the adjustable guide arm as close as possible to the size of the workpiece. Not only will this help you get a straighter cut, it reduces the severity of the twist as the blade passes through the guides, which reduces the fatigue this part of the travel has on the band.
Worn Guides:
Guide bearings are a consumable and need replacing, usually every 12 months or so on high use machines. It isn’t only a question of whether the bearing is still turning freely – because of the pressure from taking the twist out of the blade, the bearing case actually wears to a taper. When this happens, either the blade starts cutting off-square, or if you have carbide guide pads as well as bearings, the carbide pads are forced to do more of the work straightening the blade through the cut. As mentioned earlier, where the carbide pads are rubbing the side of the blade, especially if they are pressing unevenly, you have a perfect blade cracking recipe.
Poor Guide Design
Some machines only have carbide guide pads and no bearings. These machines will generally have higher blade costs. Your best hope of keeping blade cracking to a minimum is to keep the guide pads in good condition by having them professionally re-ground to a flat surface or replaced reasonably regularly. Another trick which doesn’t fix the issue but does ‘band aid’ it somewhat, is to ensure your coolant mix is kept rich at 15% or more concentrate to water. This has the effect of mitigating the rubbing of the guides by increased slipperiness.
Wear & Tear
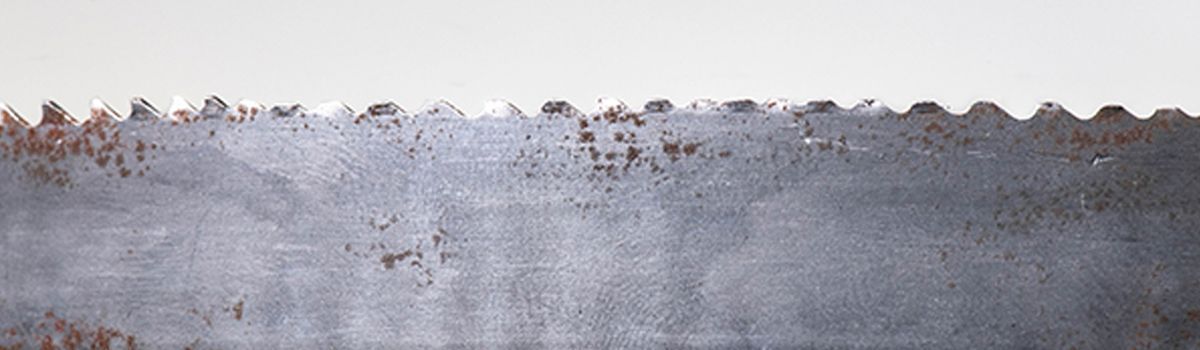
If you bend a piece of metal backwards & forwards for long enough, it will fatigue and break, right? Consider this: Every time your bandsaw blade makes one revolution, it has bent backwards & forwards twice, and twisted twice. Even if it performs no cutting, it is wearing out and will eventually break through metal fatigue. Especially where bimetal blades are cutting soft materials such as aluminium, it is often the case that by the time the blade snaps, the teeth are still like new but the band is worn out. In this case there will often be numerous other fractures around the rest of the blade.
If you blade is blunt, it will also be putting additional cutting stresses into the band compared to when the teeth were new and will eventually lead to breakage.
Material size vs. machine capacity
If a large proportion of your cutting involves using your machine at or near capacity, necessarily your movable guide arm will have to be set at or near its maximum travel. As outlined earlier, this means the blade passes through a shorter twist as it travels from the wheel to the guide. The tighter the twist, the greater the fatigue and the greater the ‘tearing’ action working on the edges of the blade.
Where possible, our recommendation is to purchase a machine which has at least 10% greater capacity than you think you’ll need. That said, if you only expect to need the full machine capacity for a small proportion of your cutting, you will be fine with the smaller capacity.
Some bandsaw models have a relatively short blade length when compared to the width of the blade or cutting capacity. This means a shorter than average twisting length as the blade passes from the wheel to the guides and back again, which in turn means a higher blade fatigue factor. Shorter blades cost less, but you will almost certainly get through them quicker.
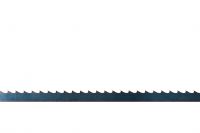
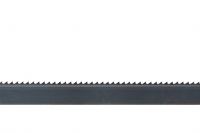
Blade Tooth Type
As mentioned earlier, blunt teeth increase the cutting forces which are transferred into the band. Similarly, an incorrect tooth shape for the material you’re cutting can needlessly feed more stress into the band. This is a higher risk in 2 situations: when solids and large flats are being cut, and when difficult/hard materials are being cut, such as some bronze alloys, titanium etc.
In the case of solids & large flats, teeth can tend to ride over the top of the material without penetrating sufficiently, so it is important a positive hook tooth is used to increase the penetrating power of the tooth. Hard materials are much the same, although often an even more positive hook angle on the teeth is necessary to dig in and scoop out the material.
If the tooth penetration power isn’t there, it falls back to the machine to force the band through the cut, assuming the down feed is powered. This places enormous stress on the band and leads to premature cracking.
Bandsaw wheel alignment & camber angle
To hold the band on the wheels, bandsaws rely on a combination of blade tension, and the ‘idler’ wheel having a slight angle (camber) to hold the blade in the correct position. And the correct position is that the back edge of the blade should run between 0.1-1.0mm away from the back lip of the wheels when under full tension. This gap will increase as tension is increased, so for machines without a tension measuring gauge, this gap can be a useful way to tell whether your tension is correct.
If your blade is running hard against the back lip of the wheel no matter where you tension the blade to, chances are it will be wearing away the lip as it tries to move towards its natural track. This constant rubbing can lead to cracking, and in advanced cases where a large chunk of the wheel lip has been worn away, the area where the blade tracks will no longer be perfectly flat, causing lateral stresses in the band.
If your blade is running further away from the back lip of the wheel than it should, more of the blade than necessary will also be hanging over the edge of the wheel. This means unequal tension across the width of the blade, and over time it also can lead to the edge of the wheel becoming rounded over, so your blade is no longer running on a flat surface.
None of which is good for the blade! The solution in either case is to ensure the wheel surface is flat by re-machining it if necessary, and adjust either the camber angle or position of the wheel/s so the blade is no longer rubbing on the back edge or tracking too far off the front edge. Also check the condition of the wheel bearings as deterioration in these can be the cause of blades tracking too far off the wheel.
Band composition & quality
Not all blades are created equal! Aside from the purity & integrity of the backing steel from different steel manufacturers, there are different steel compositions and heat treatments which all lead to a greater or lesser band life. Some machines will be fine with some manufacturer’s blades, and not with others. Trial and error is about the best strategy we can offer you here, though we have found that blades with a good percentage (4%) of chromium in the backing material tend to stand up to more stress.
Other less common factors
Rarer factors causing bimetal blades to break include blade tension, material clamping (especially when bundle cutting) and the concentricity of the band wheels. 15 years ago we would have included blade tension as one of the major factors, however we find the vast majority of operators are now relatively well aware of its importance, so it’s not often a source of breakage these days.
If you need more specific or direct help with a breakage problem, please don’t hesitate to reach out to one of the team.