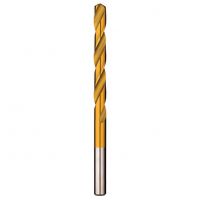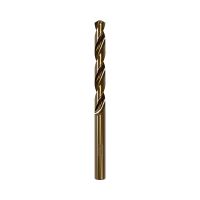
Basic twist drill bits have been around forever, and there’s not much to say about them that hasn’t already been said. But that doesn’t mean it’s understood, certainly not as well or widely as it ought to be. Different workpiece materials will place different demands on the drill bit so, just like all tooling, better understanding of their design will help yield better, more cost-effective results. So let’s start with taking a look at the physical fundamentals that make up a twist drill.
What’s the point?
Probably not what you first think! Although it does help to centre the bit, it’s important to note that at the very centre the point is not really doing any cutting. The cutting happens at the angled edges, called The Main Cutting Edges. If a drill end was simply cut off at 90 degrees to its length, giving a square end and no actual ‘point’, the two cutting edges at the tip could still cut their way through the material just like two rotating chisels. The Main Cutting Edges are usually angled, so where they intersect is known as the Cut Chisel Edge (or simply “the point”). The Point Angle is the angle between the Main Cutting Edges, and as the point gets sharper this angle decreases – that square-ended bit we imagined earlier would have a Point Angle of 180 degrees.
Smaller point angles (more pointy points) make centring the drill easier and help reduce the risk of ‘skipping’ on smooth, curved or slippery surfaces but increase the period when a bit is rotating on the workpiece without actually cutting a hole (referred to as Tapping Time). Pointier points also mean longer Main Cutting Edges, spreading the load.
Larger (wider) angles shorten the tapping time but require greater contact pressure for centring in harder materials and result in shorter Main Cutting Edges.
Back to the Point
Most bits do not have Main Cutting Edges that simply come together as a sharp point at the Cut Chisel Edge. Whilst the ‘point’ has no cutting effect (as described earlier), it does exert pressure and friction on the material, consuming power and generating heat. Most designs reduce this negative effect by ‘thinning’ the Cut Chisel Edge, improving the tapping time and helping the centring. Various thinning geometries are used but typically they have the appearance of a chamfer on the cutting end of the drill.
Flute Profiles vs Core Requirements
The flutes allow chips to move away from the cutting face, and freedom of movement is the key to success. Poor chip removal will lead to breaking bits.
Flute profiles generally fall into two groups, wide and flat or deep but narrower. Wide and deep may seem like a good idea, but a drill bit needs enough material at the core to have the necessary strength and resilience. Thick cores provide greater stability and are better for higher torque or harder materials, plus they are good choices for hand drills as they offer greater resistance to vibration and lateral forces.
Guide Chamfers and Cutting Edges
The edges of the flutes have Guide Chamfers ground along their length. These incorporate Secondary Cutting Edges that help to clear chips adhering along the bore walls and aid in the guidance of the bit through the material. They play a major role in the quality of hole finish.
Helix or Spiral Angle
The length of the Secondary Cutting Edges is largely dependent on the angle that the flutes rotate around the centreline of the bit, called the Helix Angle or Spiral Angle.
Helix Angle plays a very important role in chip formation. Greater Helix Angles mean ‘flatter’ (longer) spirals with more turns, smaller angles mean steeper (shorter) spirals with fewer turns. The longer spirals produce longer chips and are most effective in softer materials, while the shorter spirals are good for harder materials producing small chips.
Too Much Information
While this seems awfully complicated for simple tools, don’t worry, it’s pretty much taken care of by the manufacturers who select the correct combination of the features for the intended use of the tools, so all you really need to be doing is buying the right tooling for the job. That said, it does show why it’s important to know the differences, so you can understand that some tools made for a particular role do not perform well in other applications.