
Common bandsawing mistakes are costing NZ business thousands of dollars a year – that’s money coming straight off the bottom line! Avoid these all-too-often encountered problems and help maximise your profitability and productivity with this list of the most common bandsaw running errors.
If you’re having problems that don’t appear on this list, we detail 5 less common issues in THIS ARTICLE. If we still haven’t covered the issues, get in touch today, we’d love to help.
Click on each of the topic titles below to see full details of the problem and how to avoid it.

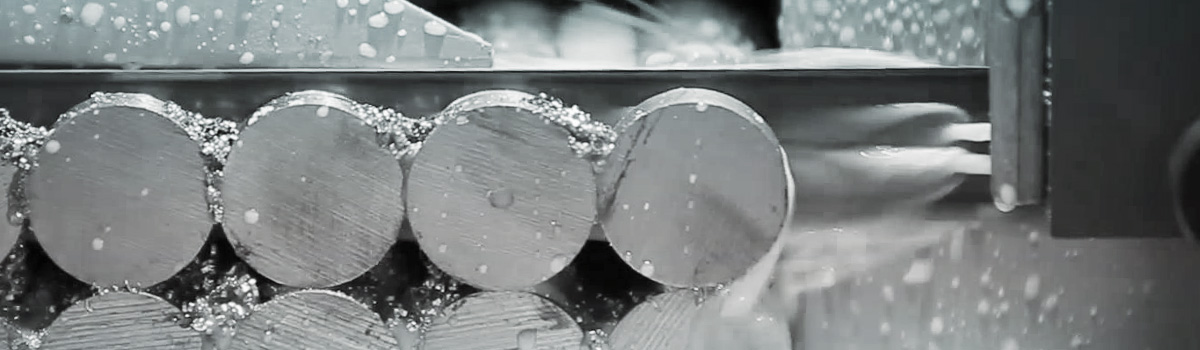
A good candidate for the most common cause of bandsaw problems, it’s surprising (and a bit disappointing) to see so many users not taking the care to properly run in a blade before going hard and ploughing through the work.
Most metal removal tools are manufactured to a very sharp edge and bandsaw teeth are no different. Like a freshly-sharpened pencil, they require a bit of care for the first few times you use them, effectively “knocking off” the super-sharp and brittle edges of the new tool without applying so much pressure that the edges are damaged.

It sounds a bit counter-intuitive, having to microscopically blunt the blade to make it cut better, but this is exactly what it needs as new teeth are so finely formed that for a short period they cut too easily, potentially overloading them to the point of damage. If proper run-in is not carried out, you will be throwing away a portion of the blade life before it’s really had a chance to begin working – a 50% reduction is common and it can be significantly more. This could more than double your production cost-per cut!
So, for the first half-hour of use, use a 50% reduction in down-feed and then gradually increase that to the normal rate over the next half-hour. Taking it easy for just one hour will pay itself back many times over through the life of the blade.
You can see more about premature blunting of blades in THIS ARTICLE.
Your well run-in blade now going at full feed rate through the metal is going to create some heat, which you’ll need to dissipate to avoid damaging the blade. Cooling & lubrication problems are one of the most common causes of customers not getting the best from their blades.
Almost all of the coolant-related problems we see come down to just three root causes: insufficient coolant, wrong coolant choice or coolant in poor condition.
Insufficient coolant can be a simple case of not enough emulsion flowing over the blade & workpiece, or it could be that the concentration is too weak. Occasionally the concentration is too high, but that’s pretty rare to see. Recommended concentrations vary depending on material type and coolant formulation, etc. but as a starting point, look for about 15% concentration on most materials and 20% on stainless and other tough materials.
Wrong coolant is a bit more complicated, as any coolant is better than no coolant, but choosing the correct formulation for the work at hand is important to get the most out of your blades. It may also be that your operation will benefit from using a neat misting oil application rather than the typical flood coolant option. If you’re usure, get in touch and we’ll discuss which options would suit you best.
Poor condition coolant is something we see quite often, and unhealthy coolant is inefficient coolant. In extreme cases, it can bring other problems, such as corrosion and OSH concerns, too. Fixing poor condition coolant can be viable if caught early, adding biocides and other treatments can extend the life of the fluid in your sump. But in cases where the fluid is heavily infected or degraded, emptying, flushing, sterilising and refilling is the only option.

It's far better to implement a good regime of preventative monitoring and maintenance, regularly testing your cutting fluid to keep an eye on its state of health and allow you to treat conditions before they cause problems.
See the following articles for more help and advice on coolants:
8 SIMPLE STEPS TO LOOKING AFTER YOUR CUTTING FLUID
Blade tension is probably the easiest to fix. About 10 to 15 years ago this would have been one of the most common, but as more and more operators have become more aware of blade tension requirements, we encounter it less than we used to. To many, the amount of tension required can be quite surprising, even a little bit intimidating.
We still see operators who tighten their blades to about 5000 or 6000 psi and believe that this is plenty, some even think they might be overdoing it and any more will risk damaging the blade or machine. In truth, they need a lot more, between 25,000 and 30,000 psi is usually about right! If it’s not tight enough the blade will flex or bend, leading to fatigue and cracking or possibly uneven cutting and broken teeth.
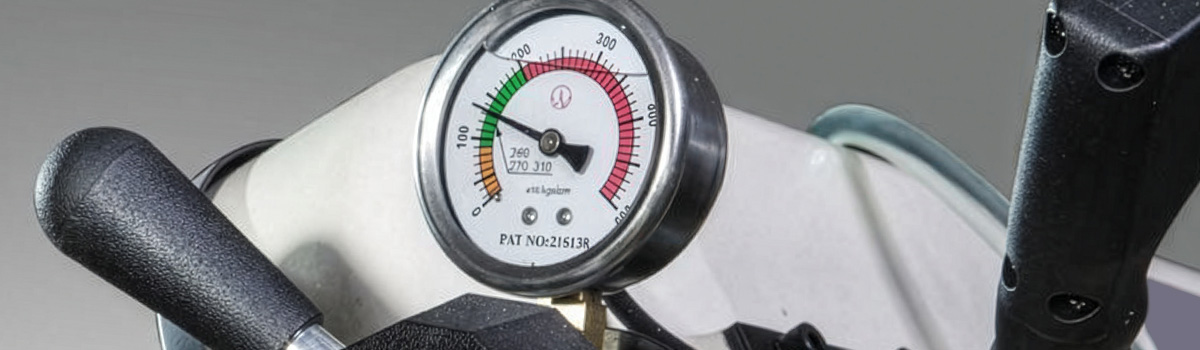
Some bandsaw machines have a tension meter fitted, which makes correct tensioning easy, but if yours does not, a stand-alone meter that fits on the blade (when not in use, obviously!) is just as effective.
At the very least, always keep in mind that the chance of you overtightening a blade is so small it’s close to negligible, but undertensioned blades are a common cause of problems – so if in doubt, tighten some more!
If you’re concerned about insufficient tension in your bandsaw blades, our simple-to-use tension meter will solve your problems for the cost of a few average blades – GET YOURS ONLINE HERE.
Most customers have a good handle on the tooth pitches required for different workpiece sizes, profiles and materials but we still encounter many who are not sure.
The size of what you are cutting is the most important consideration here, all other factors are secondary. Yes, it makes a difference if you’re cutting hard chrome bar or similar materials, but it’s the material size & profile that sets the baseline. The only exception is with induction-hardened workpieces, which will need tungsten tipped blades and they only come in a very limited number of pitches anyway, simplifying your decision.
Also, don’t forget that other factors may be at play, such as blade approach angle or bundle-cutting, so be prepared to do a little maths when dealing with tooth pitches.
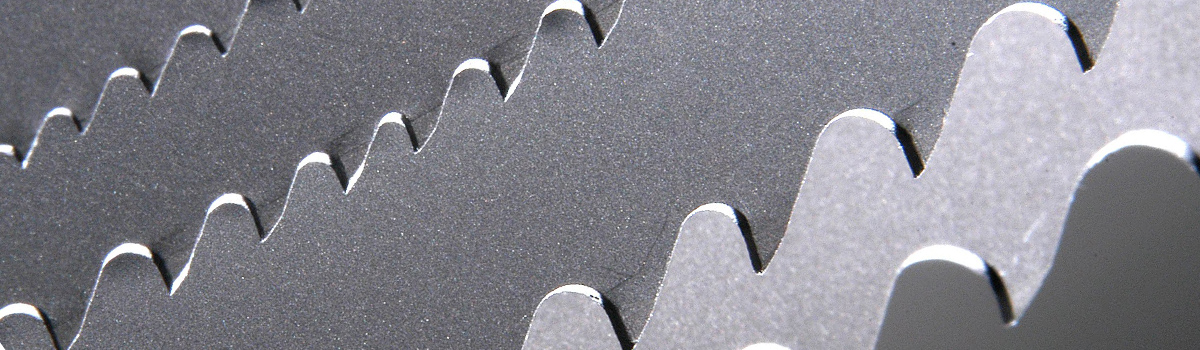
As a general rule of thumb, aim for between 3 and 22 teeth in the cut at all times. Too few teeth will mean that the following tooth may impact the material on the way in and too many means the swarf cannot escape from the overloaded gullets in time, often cracking the teeth and causing them to fall off.
Your best protection against these problems is understanding how to select the correct pitches, or getting advice from trusted sources (like Wolfmach!).
So, next time one of your operators tells you they need a 10-14tpi blade to cut those 25x25 stainless bars, because “they’ve always done it that way”, take it with a pinch of salt and check it out yourself!
See Our Quick-Guide to Bandsaw Blade Pitch Selection for an overview.
And finally, let’s not forget that one of the most common mistakes is trying to do everything ‘on the cheap’!
It’s always very tempting to cut costs at the front end by reducing the per-item price, but bear in mind that, as with most things, you get what you pay for with blades. A bandsaw blade is more technical than it may appear to the average user, especially when you can buy some of them at DIY retailers and other non-technical outlets. Lower cost blades come from lower cost manufacture, and those costs can only be reduced by a limited number of compromises.
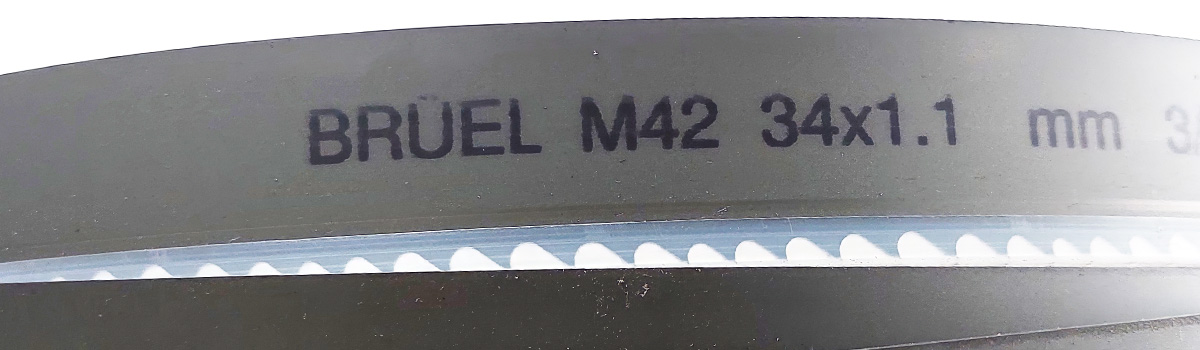
To get the best from the money you spend on bandsaw blades, you need to maximise the cuts you get from each one. Paying attention to the points we’ve covered in this article is a very good way to improve your return on bandsaw blade investment but if you’re really serious about spending less overall, you need to buy the blades that offer the lowest cost per cut.
SUMMARY
Many New Zealand bandsaw users do not get the blade life (and therefore the ROI) that they require. This list details the bandsawing issues that we encounter most when speaking to NZ users, and these problems make up about 65% of what we’re regularly asked about. The solutions are usually pretty straightforward but some will require operators to take on a bit more understanding of how blades work or how bandsaw machines should be maintained and used.
The good news is that we’re here to help, with lots of useful hints and advice in our blog articles, or at the end of a phone if you need to speak to us. And when all else fails, we’re happy to help you solve the problem face to face.
We’ve also put together a follow-on list of the other bandsawing problems regularly reported by customers, so if you don’t find the answer to your problem in this article, try THIS ONE instead.