
Following on from our list of top 5 common bandsawing mistakes and how to stop losing money through them, this article describes other bandsawing problems regularly reported by NZ users.
If you find we still haven’t covered the issues, get in touch today, we’d love to help.
Click on each of the topic titles below to see full details of th problem and how to avoid it.

Running through solid metal is right in the wheelhouse of metal-cutting bandsaw blades, it’s what they’re mostly made to do, so most customers have no problems with tooth geometry choice. However, structural steel and other profiles do present their own unique challenges for a blade, particularly one that’s not specifically designed to cope. Just look at it from the point of view of a single tooth – there you are just doing your job, cutting through something like a 10mm wall and out into fresh air the other side… then Wham! along comes another chunk of steel to meet you head-on. It’s easy to see how this creates a whole different set of forces to just cutting solid blocks.

Specialist structural tooth forms are designed to cope with these forces better than standard blades and can significantly improve blade life in profile cutting operations. But, being specialists, they generally don’t tend to do so well on the solid materials, except that there are some even more specialised tooth forms that do make a good job of both, just to add a bit more to think about in case you were getting bored.
Consider stocking different blades for different types of workpiece and changing blades as you need to. Alternatively, and especially if you think you need a blade that will cope with everything, get in touch with us to find out more about the different profiles and how they could help.
You can read a bit more about different profiles in the “Tooth Geometry” section of THIS ARTICLE.
We're talking here about the rotation speed of the band, the speed the blade travels across the cutting zone, which is usually expressed as metres per second.
We come across this quite often, it’s a surprisingly common problem and comes up a lot when customers are cutting harder materials. In a way, it’s understandable because it can seem counter-intuitive to go slower, sometimes much slower, when the material is harder to cut – after all, when the challenge is greater, you tend to work harder, don’t you?
But faster and better are not always the same, consider this:
The teeth on a blade cutting stainless or tool steel are going to penetrate the material a lot less easily than if it were mild steel, because it’s harder and more resistant to being cut. But the teeth, carried by the band of the blade, have no choice but to just move along, riding over the surface of the metal they’re struggling to bite into, with the inevitable result that friction and heat build up in the blade. And where there’s excess heat, there is damage and reduced blade life.
Slow the blade down, often right down – 30m/minute or less – and give the teeth a chance to start cutting into the material. The molecular shearing forces involved in cutting create a lot less heat than friction plus the coolant can carry most of it away in the chips. So keep your coolant plentiful and richly mixed, too, to further reduce the build up of friction or heat.
And don’t run them too slow, either. It’s not really a common error but worth mentioning while we’re here. If you’ve just read the advice about running the blade at too high a speed, you can probably guess this one. Too low a blade speed will allow the teeth to over-penetrate, risking too much pressure on overloaded gullets and cracked or broken teeth, also increasing the potential for the blade ‘grabbing’ the material on softer metals.
If you’re unsure of the blade speed you need, check with your blade supplier.
See more about premature blade blunting caused by incorrect speeds in THIS ARTICLE.
Continuing on the theme of incorrect cutting parameters, the feed rate is also important if you want to get the best from your spend on blades.
Feed Rate Too Low
Too little feed rate can create extra friction and potentially work-harden the material, as well as causing major problems for the teeth as all that friction turns to heat. Teeth that have been dulled or softened through over-heating are never going to cut as well as they should and while coolant may go some way to mitigate the problem, avoiding heating the teeth in the first place is a far better policy.
Bandsaw teeth are not designed to rub metal away, or grind a groove in the material. They are specifically made to shear chips from the workpiece through a cutting action as they travel across the material, which requires enough feed pressure to penetrate the material to start the cut and continue cutting throughout the contact zone.
Let the Chips Guide You
Keep the blade working as designed and allow it to form chips that look like little 6's and 9's. If your chips are small and grainy or like dust, you probably need to increase your feed rate and possibly reduce your blade speed - check the recommended speed and feed for the material against your saw's settings.
Feed Rate Too High
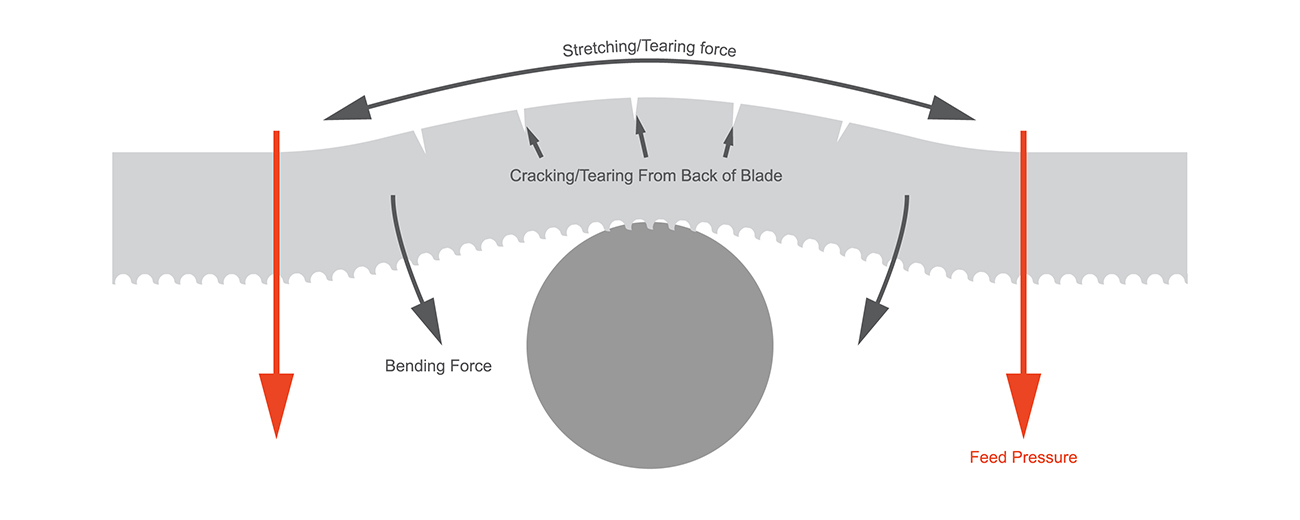
We also often encounter a combination of insufficient tension and too much downfeed pressure, a problem which typically manifests as lots of small cracks running from the back of the blade. The lack of tension means the blade can deflect or warp more easily and the excessive feed pressure pushes the blade onto the workpiece, bending fractionally around the cut in the plane of the blade. The back of the blade is stretched as it covers a greater distance than the teeth, cracking as a result and eventually breaking.
Again, the best way to avoid this is by ensuring you are using the correct speeds & feeds, and check that your blade is correctly tensioned.
If you’re unsure of the blade feed rate you need, check with your blade supplier.
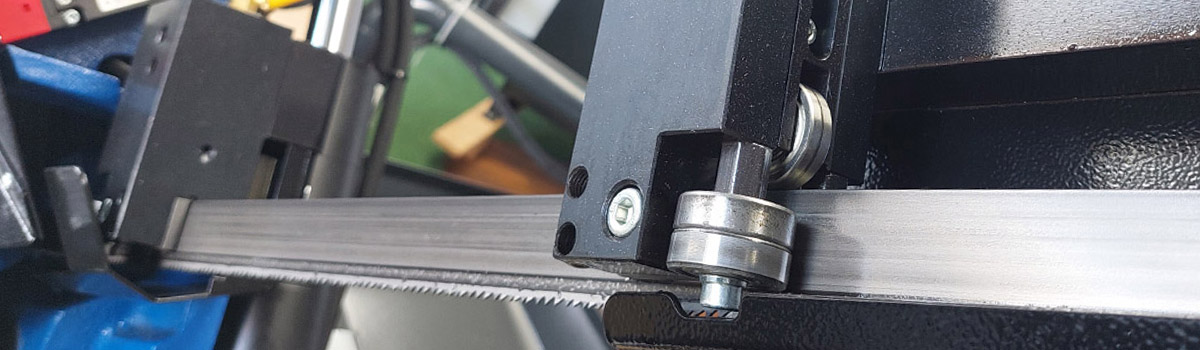
Not all bandsawing mistakes are to do with the blade or cutting parameters, some are related to the machine itself. One of the common errors we see is operating a bandsaw with worn, misaligned or damaged guides. For the sake of being comprehensive, we should mention that some machines come with very rudimentary guides but it’s unlikely that a professional operator would be using such a machine.
Guides usually consist of bearings and pads that align the blade for the cut. The blade twists through 90 degrees and back again every time it goes round the machine’s wheels and, when set correctly, the guides control & limit the extent of this twisting. As the bearings contact the blade they straighten it into the cut, effectively rotating the band up to 90 degrees, then control the winding-off of that twist as the blade leaves the cutting zone. The pads should be set very close to the blade and can be touching it SO LONG AS THEY ARE NOT PRESSING ON IT UNEVENLY. Remember that the bearings do the straightening work, the pads are ONLY there to catch a blade if it deflects during cutting.
If the guides are not doing their job, the blade will have some play and this can cause problems from fatigue in the blade to curving cuts. Depending on your machine, one or both sets of guides will be movable and should be positioned as close as is practical to the workpiece being cut, this helps keep the blade as taut as possible in the cutting zone.
See more about setting your bandsaw’s guides in THIS ARTICLE.
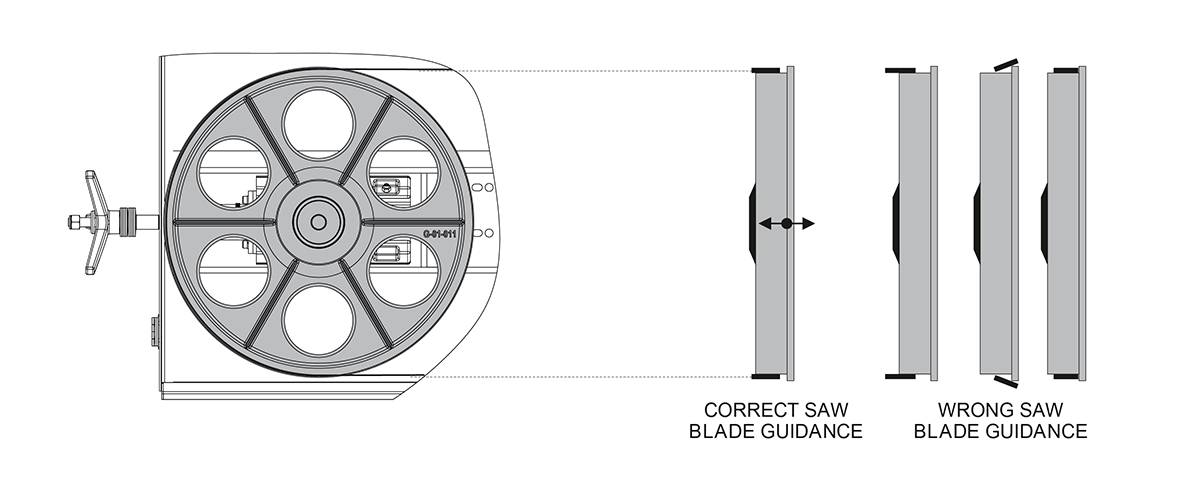
Also within the machine problems category, we frequently see machines that don’t have their wheels aligned correctly. This causes unnecessary twisting and straining of the blade, leading to reduced blade life and it can also end up "chewing" away the lip of the wheels.
Refer to your machine’s manual or contact the supplier for specific details of how to check and adjust your blade alignment, although it’s usually fairly simple to do.
The idler wheel will also have a camber adjustment to keep the blade tracking true. The blade should run in a position so the back of the band is almost (but not quite!) touching the lip on the back of the wheel.
If you suspect your bandsawing issues might be down to wheel alignment or camber and need some help, get in touch with one of our experts for a full discussion on how to fix the problem.
SUMMARY
Many New Zealand bandsaw users do not get the blade life (and therefore the ROI) that they require. PART ONE of this list details the bandsawing issues that we encounter most when speaking to NZ users, this is a follow-on list of the other bandsawing problems regularly reported by customers, so if you don’t find the answer to your problem in this article, PART ONE will almost certainly have the answers you need.
The solutions are usually pretty straightforward but some will require operators to take on a bit more understanding of how blades work or how bandsaw machines should be maintained and used.
The good news is that we’re here to help, with lots of useful hints and advice in our blog articles, or at the end of a phone if you need to speak to us. And when all else fails, we’re happy to help you solve the problem face to face.