HOW TO INSTALL AND SET UP YOUR MQL MISTING UNIT
1) Unpack the product in the upright position and ensure the unit is in good condition with no signs of damage, particularly around the reservoir & pump connections.
2) Ensure the on/off button is in the off position.
3) Electrically connect the unit ensuring correct voltage is used. Units are produced as 24V AC / DC as standard and must be installed by an electrician / electric technician.
4) Install the product in an upright position where it is needed. Horizontal or inclined-type installations may prevent the system from working and cause problems.
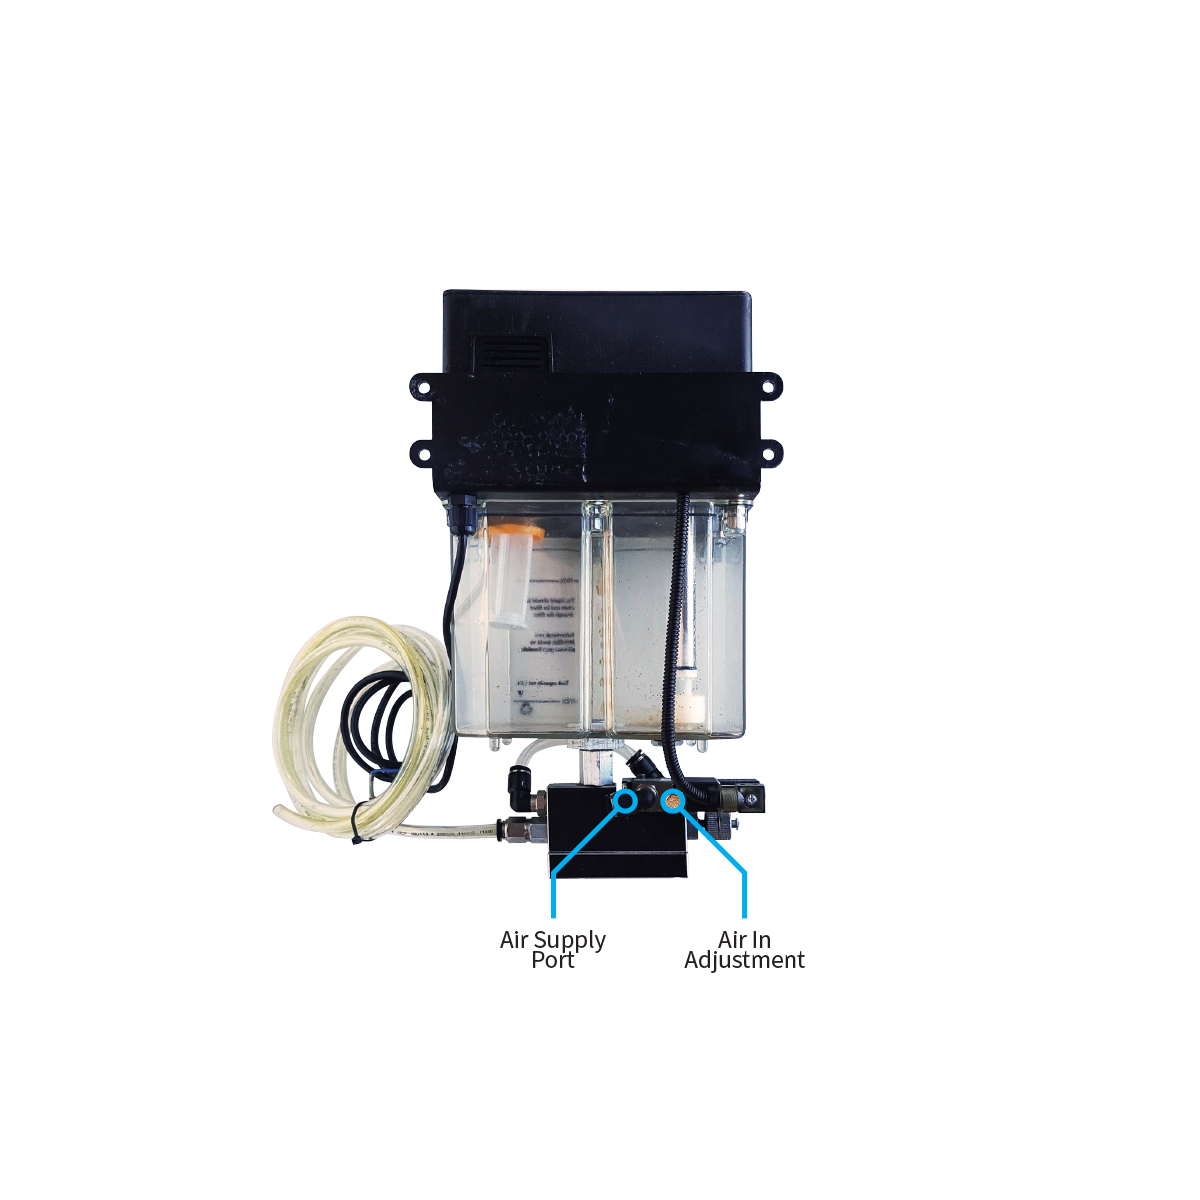
5) Connect the air to the air supply port. (Recommended working pressure is 6-8 Bar.)
6) Open the reservoir filler cap and fill the tank with MQL liquid up to the max line with the help of a funnel. (Never operate the product without MQL liquid inside. Do not use it with water or other liquids. Do not mix other oils or grease with the MQL oil in the tank.
7) Loosen the oil bleed screw and re-tighten once the oil begins to flow freely.
8) Fully open the oil volume adjustment.
9) Bring the ON-OFF button of the product to the “on” position. Air pressure must be a minimum of 6 bars, always use filtered air (air must not contain particles or liquid).
10) After the above steps, the lubrication system will start to work in the factory settings.
11) You will see the oil flowing through the transparent hose to the nozzle.
12) In some cases, some air in the pump prevents the oil from being discharged. In this case, while the product is in operation, loosen the oil bleed screw at the bottom of the pump until you see the hole in it. (CAUTION!! Do not fully remove this bolt.) Within 4 to 5 seconds, oil should be seen coming from the hole in the bleed screw. Wait a further 4 to 5 seconds and tighten the bleed screw. This process will remove any air trapped within the pneumatic pump stroke.
13) Once the unit is set up you can adjust the frequency of the lubrication spray using the lubrication pulse interval dial (higher values give longer delays between sprays) and the length of the spray using the lubrication pulse duration dial.